
When I was
constructing the troll costumes, I wanted to try something new in form of
casting and mold making. Both of our trolls have harnesses with buckles, so I
ended up casting the fastenings from polyester in a Formaform mold.

Formaform
is a synthetic and elastic rubber material for mould making. I bought the
smallest package, 1,25kg from Hobbypoint, Finnish crafting store. The package
contains three different ingredients; granules, liquid and Thermolan, a type of a hardener.
The
granules smells pretty bad, but its environmental friendly and you can use it
over and over again by cutting it to pieces and melting it again. Nice plus if
you haven’t made molds earlier and mess up the first ones, like I did. I think
the process pictured below is my third try. Read the instructions well
beforehand. You never know, if I cut some corners.

First you
need to prepare the working space. What you need is a stove and a retired pot,
a scale for measuring, wooden sticks or spoons and cardboard cups. Then you need
a container for the mold. I used a juice tetra which I cut in half and
strengthened with tape. The master piece is taped to the bottom of the
contained with two sided tape. The wall of the mold should be at least 6mm
thick. That should be taken inconsideration when choosing the container.


Before I
started to melt the Formaform, I sprayed the master with silicone spray. Then I
measured the ingredients; granules and liquid in ratio 100/40. I turned up the
stove to medium heat, poured the ingredients in and started to stir carefully
with a wooden spoon. You don’t want air bubbles. The stuff is ready as soon as
it turns liquid.


I poured
the stuff on the mold container and checked the master’s surface for any air
bubbles. I pushed the bubbles out gently with a paintbrush.

Then the
mold needs to set. The time depends on the size of the mold from half an hour
to hour. Formaform will turn rubbery. When that occurred I carefully removed
the mold from the container and pulled the master out. I trimmed the edges and
check the mold.

First two
molds weren’t good enough, so I just chopped it up and melted it again. The
third one was almost perfect, so I let the mold cure 12 hours before the next
step. At this time the mold will lose some elasticity, but remain rather
flexible.

Because I
was using really strong, industrial material for the casting I had to reinforce
the inside of the mold. Otherwise the polyester pull would tear the mold apart.
Formaform comes with a bottle of liquid that is used to make the mould heat
resistant. It hardens the inside of the negative mold so that it can endure
materials like resin and hot wax.
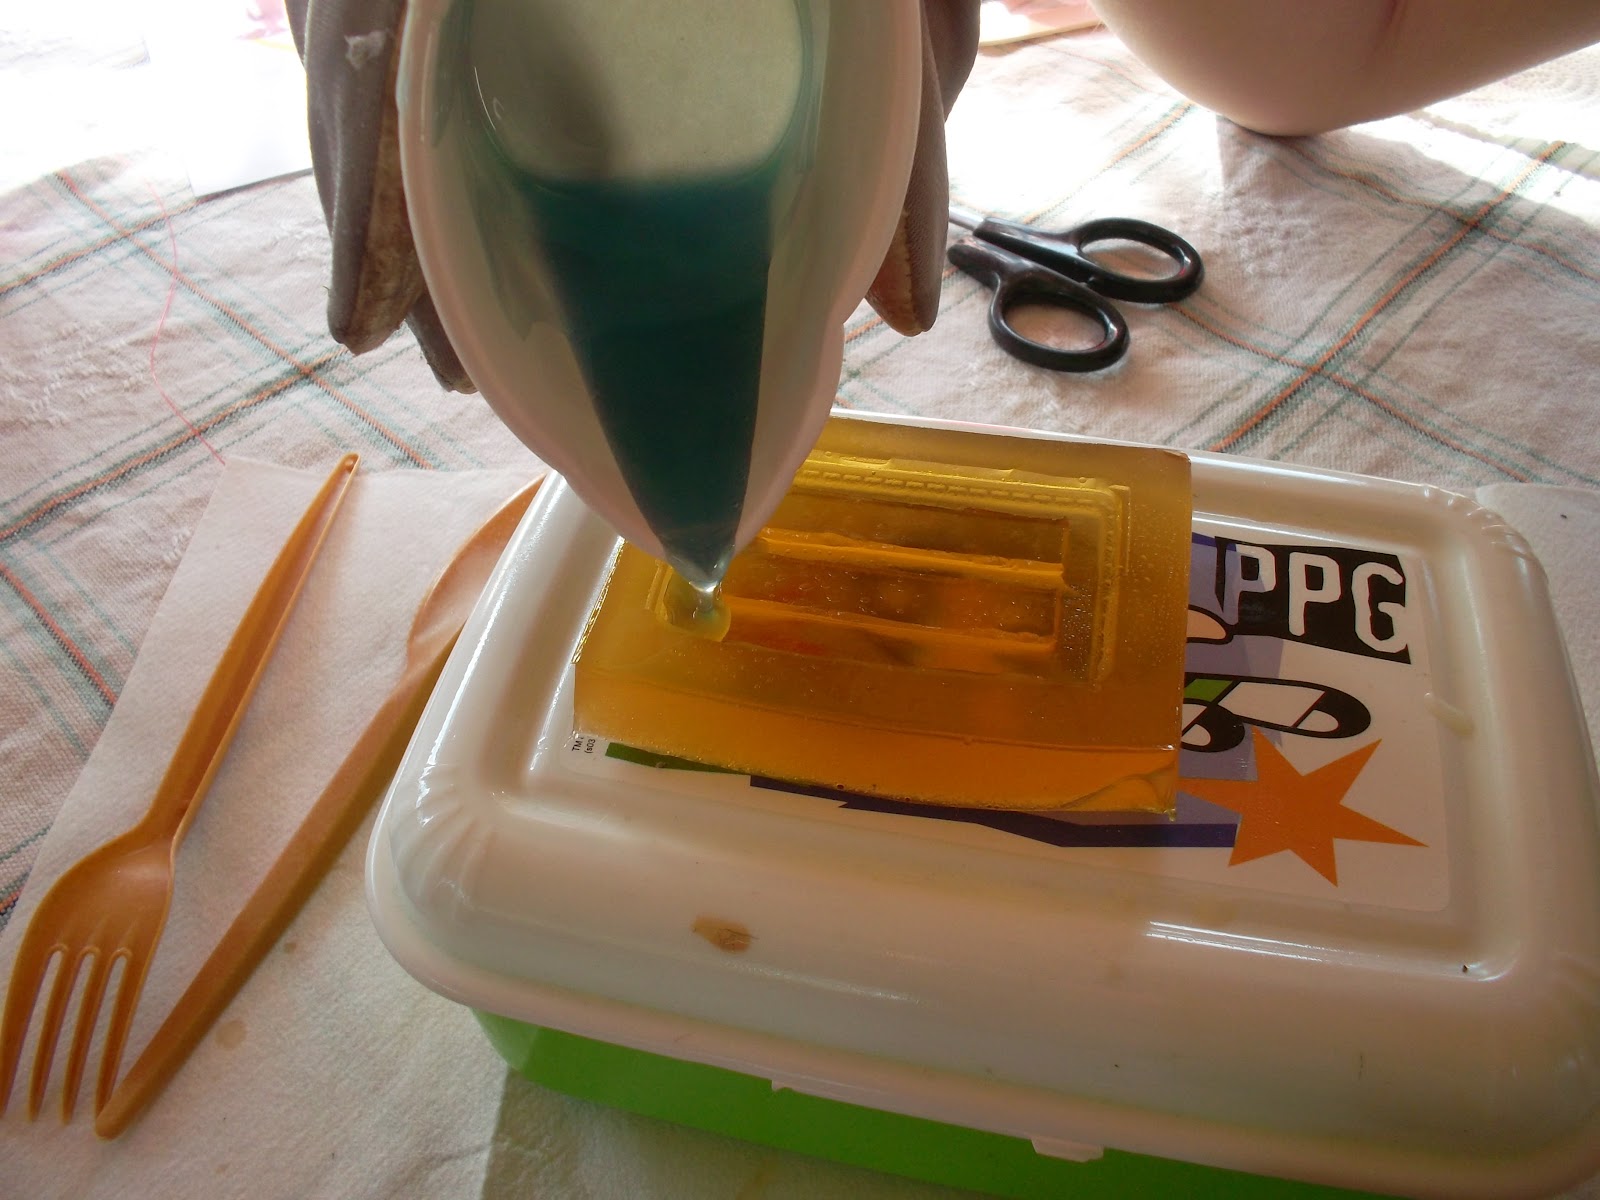
I poured
the liquid on the negative and let it set for ten minutes. Then I just poured
the stuff out and let the mould cure until the inside had felt solid as the rest
of the mold remained rubbery.


Then it was
time to mix polyester filling with hardener and pour it into the mold. I
recommend using a respirator and pair of gloves when working with irritating
stuff. If possible work in steady conditions, in room temperature if possible and
not in direct sunlight if you don’t want to ruin your cast or the mold itself.
Again, been there, done that.

It took
about 45 minutes for the polyester to cure to a point it could be pulled out of
the mold. I let the buckle to harden overnight, trimmed it with utility knife
and painted it.

In all, it
was nice challenge to try something different and because I needed a handful of
buckles, it was more affordable to cast them than buy them. And now I have
materials for future projects. But next time I’m going to buy more suitable
casting material, since the polyester filling I used was bit too strong for
Formaform. The last pull I did tore the inside of the mold pretty badly.
If you want
more information and approach to mold making, check Rullarinkeli’s blog.
Instead of Formaform, she used Vinamold. And there are videos too!
No comments:
Post a Comment