
Sunday, May 6, 2012
Video update with the Decepticons
New video has been uploaded to our Youtube page - the brilliant plan to take over the universe, part 3 745 106, starring Princess Megs and Lady Star.

Friday, April 20, 2012
Troll toes trial no. 1

Since I don’t have anything under construction right now (except for few fancy dresses for summer and a quilt works), I thought to continue our troll project with experimentations on the foot-side. It’s weird that WOW troll has three fingers but only two toes! The asymmetry is rather weird, but I will roll with it. The fingers I’m going to solve by sewing custom gloves, but the toe matter is bit trickier. I’ve seen costumers making the feet over boots, but I wanted the toes to look like they bend and act rather naturally. And I really want to make the feet look good, since people seems to loath them so much.
I’m pretty sure that I’m going to make the toes out of foam. The “how” is the thing I’m still pondering, but my first trial gave a good base to the future construction.


First I kindly asked Yoki to lend her foot so that I could draw the outline on a piece of foam. After that I sketched out how the fake toes would look like and how they are placed compared to the real toes. Then I cut away the inner section and the excess around the troll toes.
When I had the first piece ready, I copied it on another piece of foam and cut the top part of the foot. I rounded the edges and carved the inside of the top part hollow so that it would sit nicely on Yoki’s foot.


Then I trimmed the pieces until they looked fairly nice. I also added creases to where the toes might bend naturally.


Then I had a problem. These two photos show how I try to find a solution to how to wear the damn think and how to fade out the angularity of the cut edges. I ended up using the stockings for the trial.


I’ve bought a pile of blue stockings to be used as pieces of bodysuit for the trolls, but for the trial I used regular lycra to act as skin. After sewing a tight fitted sock I stuffed the toe part inside. I screwed up the pattern, but the idea worked quite nicely. Yay, for troll feet!

Wednesday, April 11, 2012
Costume cross-section- Baby Jane Splicer

My splicer costume has only three different pieces; dress, hook and a stay-up sock. If I ever wear Baby Jane again I will finish the other hook and definitely wear a wig, since my own hair wouldn't do anymore. The wig I have planned for Baby Jane is again a remnant from last decade. The bob is actually going through one of my experiments, which this time is dyeing with ink. I might tell about that ordeal later on.

The dress was rather simple task to complete. Based on the reference pictures, the cut was easy to transfer to basic pattern, as the seams follow quite faithfully the darts on the front. The dress is made from taffeta that shifts between dark green and black. The cuffs and the collar I made from some navy blue scrap velvet, which had been conserved into the depths of the sewing locker for over ten years. Now I finally found use for it! Thank goodness, my memory served me well. Cotton velvet is so damn expensive!

I added a lining on the bust and sewed plastic boning on the seams. Hidden zipper is on the back seam and the dress has too removable navy blue shoulder straps. The hem was constructed what was left from the fabric after cutting the bust and the sleeves, which I two-pieced to get the right fit. I tore the hem with scissor and added an old fake rose on the bust.

I laughed a lot while trying to take a photo of the stay-up sock, but I think you might get the idea… I didn’t want to buy a pair of socks just to destroy one, so I made one from pair of old pantyhose. The upper part of the sock or the panel is made from the crotch part of the stockings, as its bit more durable. The suspender is just a piece of black elastic band.


The hook has its own construction post. For painting the hook I used acrylics paints, mostly grey with hues of silver and copper with black on the weathering. The red is theatrical fake blood, still tacky after six months.


The make-up had rather regular composed feel to it, but this time I used make-up latex with tiny pieces of toilet paper to make the scars, with touches of fake blood. I especially liked how my knee turned out, even if it didn’t show in any of the photos. And about the black tooth lacquer… it tastes horrible.
Friday, March 23, 2012
Redesigning a wig

I haven’t styled too many wigs during my cosplay career. Years ago I somehow came to a conclusion that it was difficult, messy and altogether a long process. It became something I consciously avoided…until recently. After styling two wigs in one week with major style change, I can finally trash my prejudices. It’s not hard and it doesn’t take hours after hours. All that is required is some clean table space and patience. Maybe that is the trick; I might have become more patient.
First thing was to raid our closet, which somehow has been invaded by costumes and other supplies. I grabbed one of my many second-hand wigs. (Greetings to all the Finnish cosplayers who kindly pass on their old wigs at Aniki!) The wig is nice quality, but pretty thin on the back like some long wigs tend to be. In my case it wasn’t a problem since I was making a short one. I tied the fibers on a ponytail and cut it off to be used as thickening wefts. Since I had still some burgundy fibers left, I mixed them in as highlights.

The back flips and the small top crest I shaped using hairspray and a blow dryer. Following is the process in pictures. I apologize about the varying quality of the photos. I only had my old digital camera with me. But then again you can follow the day turn to night and to the next morning.
 |
| Wig in its original length. |
 |
| Roughtly cut and wefts added on the back. |
 |
| More wefts and styling started with feathering the ends. |
 |
| First back flip in making. |
 |
| Back done. |
 |
| Shaping the top crest. |
 |
| Styling complete. |
Sunday, March 18, 2012
Trollolollolol
Well, I didn’t finish the red wig… But I might as well reveal that the costumes we are certainly going to make this year are female trolls from World of Warcraft. They weren’t mentioned in the post where I revolved around costume plans for this year. To be frank, I might as well delete the whole post because the content isn’t anyhow correct anymore. It seems that I’m at work for whole holiday season. So it's no for going to conventions or at least for two days, which means no competitions as they usually are held at Saturdays.
You’d think that I would be a wreck, but I’m not! I’m too excited about our trolls. They are going to be our characters for Tracon’s show competition, if that kind of contest is part of the repertory. Plans changed also on that front, because our original plan was to use characters from Star Wars universe. Not a bad switch, I’d say. Wow characters are certainly more familiar to the audience in roleplay/anime convention and show class gives nice freedom with the costume design and construction.

The construction part offers again new methods and materials. We are going to take our time and hopefully get the costumes in presentable stage in the summer. What I’ve noticed with some Wow cosplayers, the costumes are never really finished. They just keep upgrading, like in the game.
The red wig I presented in the previous entry was mine. Thanks to a nice flow I got going on yesterday evening, Yoki’s wig was finished just few hours ago. As my high tail up-do reached over my shoulders, I decided to make Yoki’s wig short.

It still needs some trimming and styling on the sides, but it has to wait because for that I need Yoki's head. The bone necklace is also something I made yesterday from leftover Das clay. The feathers were the result of an experimental dyeing process with disinfectant... Weird.

You’d think that I would be a wreck, but I’m not! I’m too excited about our trolls. They are going to be our characters for Tracon’s show competition, if that kind of contest is part of the repertory. Plans changed also on that front, because our original plan was to use characters from Star Wars universe. Not a bad switch, I’d say. Wow characters are certainly more familiar to the audience in roleplay/anime convention and show class gives nice freedom with the costume design and construction.

The construction part offers again new methods and materials. We are going to take our time and hopefully get the costumes in presentable stage in the summer. What I’ve noticed with some Wow cosplayers, the costumes are never really finished. They just keep upgrading, like in the game.
The red wig I presented in the previous entry was mine. Thanks to a nice flow I got going on yesterday evening, Yoki’s wig was finished just few hours ago. As my high tail up-do reached over my shoulders, I decided to make Yoki’s wig short.

It still needs some trimming and styling on the sides, but it has to wait because for that I need Yoki's head. The bone necklace is also something I made yesterday from leftover Das clay. The feathers were the result of an experimental dyeing process with disinfectant... Weird.

Thursday, March 15, 2012
Blended wefts and high ponytail
I didn’t remember that making wefts was so easy! I really surprised myself with them and with my old wig, which actually has been featured in our blog. Here is the link to my previous post. In short, we dropped the costumes I had planned the wig for. Over a year and a half ago I just shoved the wig into my closet and almost forgot all about it. Until this morning that is, when I looked it up thrilled and motivated to re-style it. I got free day from work and because we had discussed about our costume plans with Yoki last weekend, I decided to start on that front. And this is what I got done today.

 Oh, a shovel!
I’m really, really pleased with the wig. I made some blended wefts from the long ponytail I had cut off the wig mixed with burgundy red fibers, also remnants from last decade. I’m not going to write about making wefts, there is many tutorials about them in the web, but I’m going to give a hint to those who find tulle hard to work with. Use iron-on interfacing. Stitch the fibers on the glue side and when you have trimmed the excess carefully iron the interfacing between a piece pattern paper. I fried few fibers, luckily they aren’t visible.
 Wefts on base before cutting...
 ...and after.
Next to making and sewing wefts, I cut the wig so that the extensions blend in. I feathered the wig quite heavily, but made it look chunky, like if it had been cut with a knife. Almost nothing went to waste; what I had cut, I rolled and teased into dreadlocks, which I then attached right back where they came from. The bangs keep their shape thanks to hairspray.

I still need to attach the ponytail properly. When I’ve done that, I will come back and possibly reveal what costume I’m actually making.

 Oh, a shovel!
I’m really, really pleased with the wig. I made some blended wefts from the long ponytail I had cut off the wig mixed with burgundy red fibers, also remnants from last decade. I’m not going to write about making wefts, there is many tutorials about them in the web, but I’m going to give a hint to those who find tulle hard to work with. Use iron-on interfacing. Stitch the fibers on the glue side and when you have trimmed the excess carefully iron the interfacing between a piece pattern paper. I fried few fibers, luckily they aren’t visible.
 Wefts on base before cutting...
 ...and after.
Next to making and sewing wefts, I cut the wig so that the extensions blend in. I feathered the wig quite heavily, but made it look chunky, like if it had been cut with a knife. Almost nothing went to waste; what I had cut, I rolled and teased into dreadlocks, which I then attached right back where they came from. The bangs keep their shape thanks to hairspray.
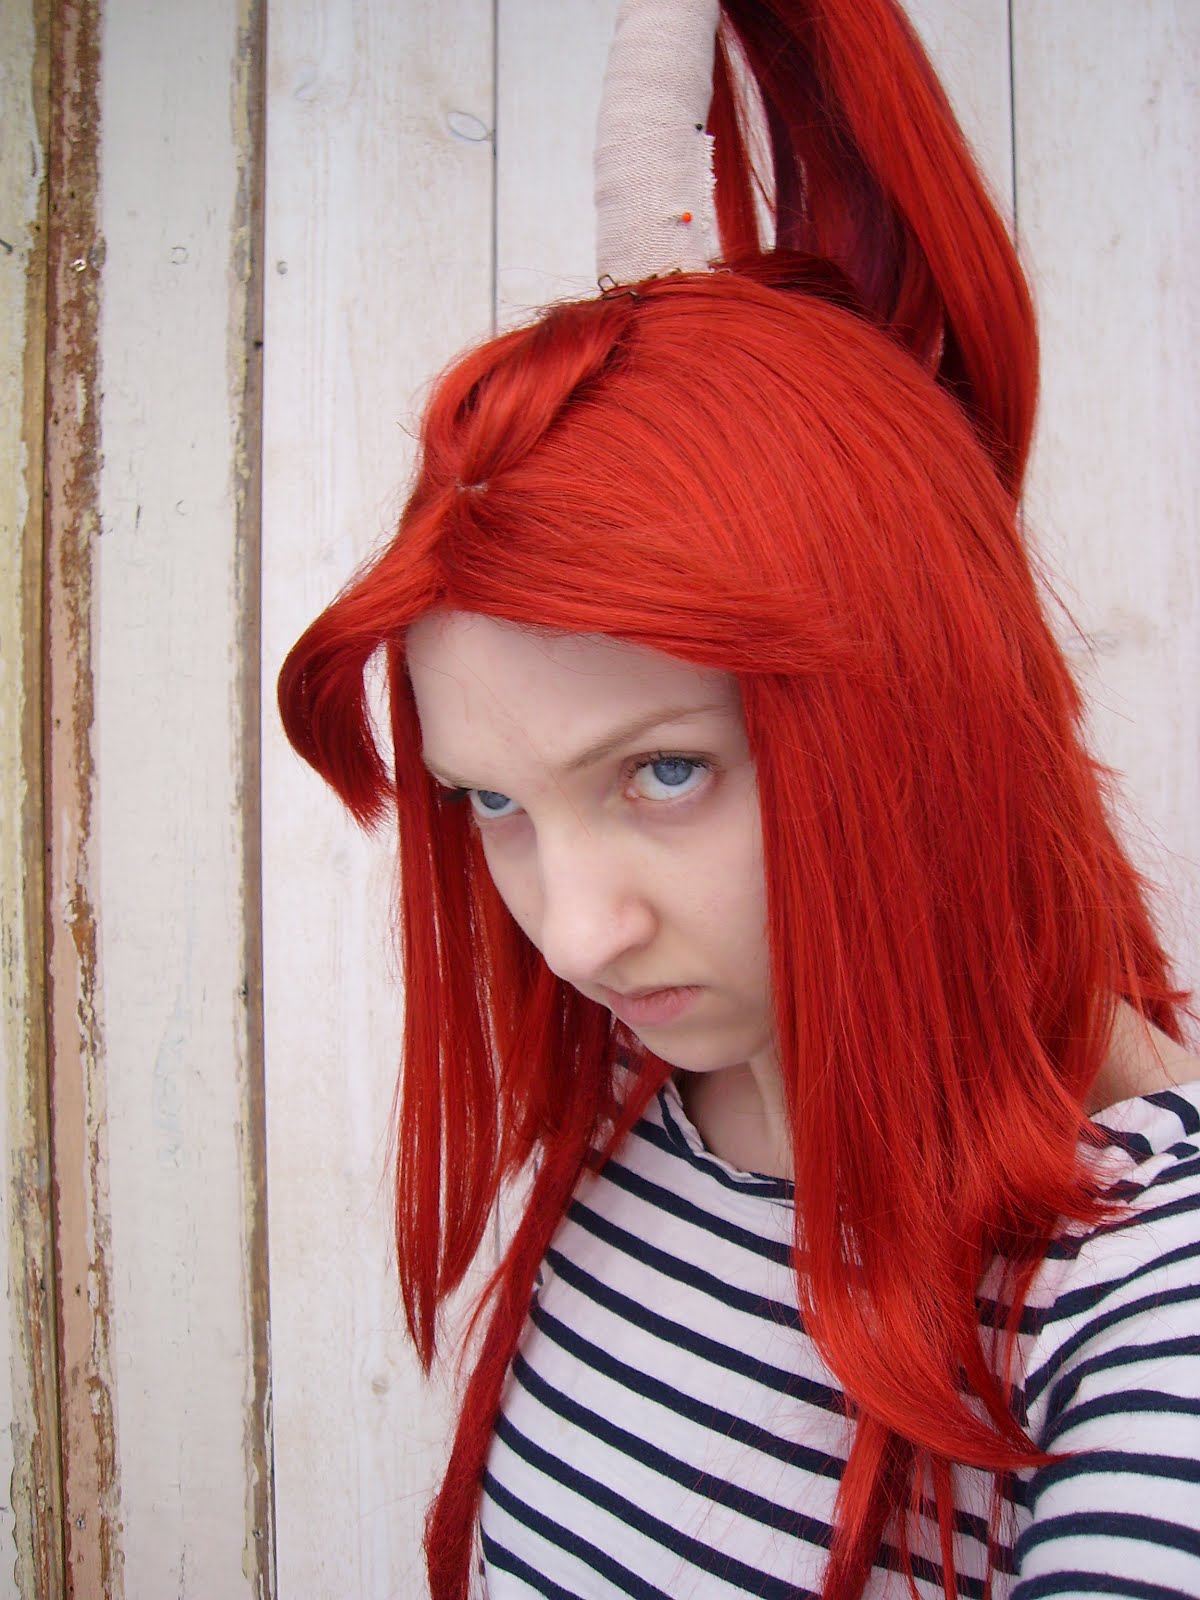
I still need to attach the ponytail properly. When I’ve done that, I will come back and possibly reveal what costume I’m actually making.
Wednesday, March 7, 2012
Subscribe to:
Posts (Atom)